
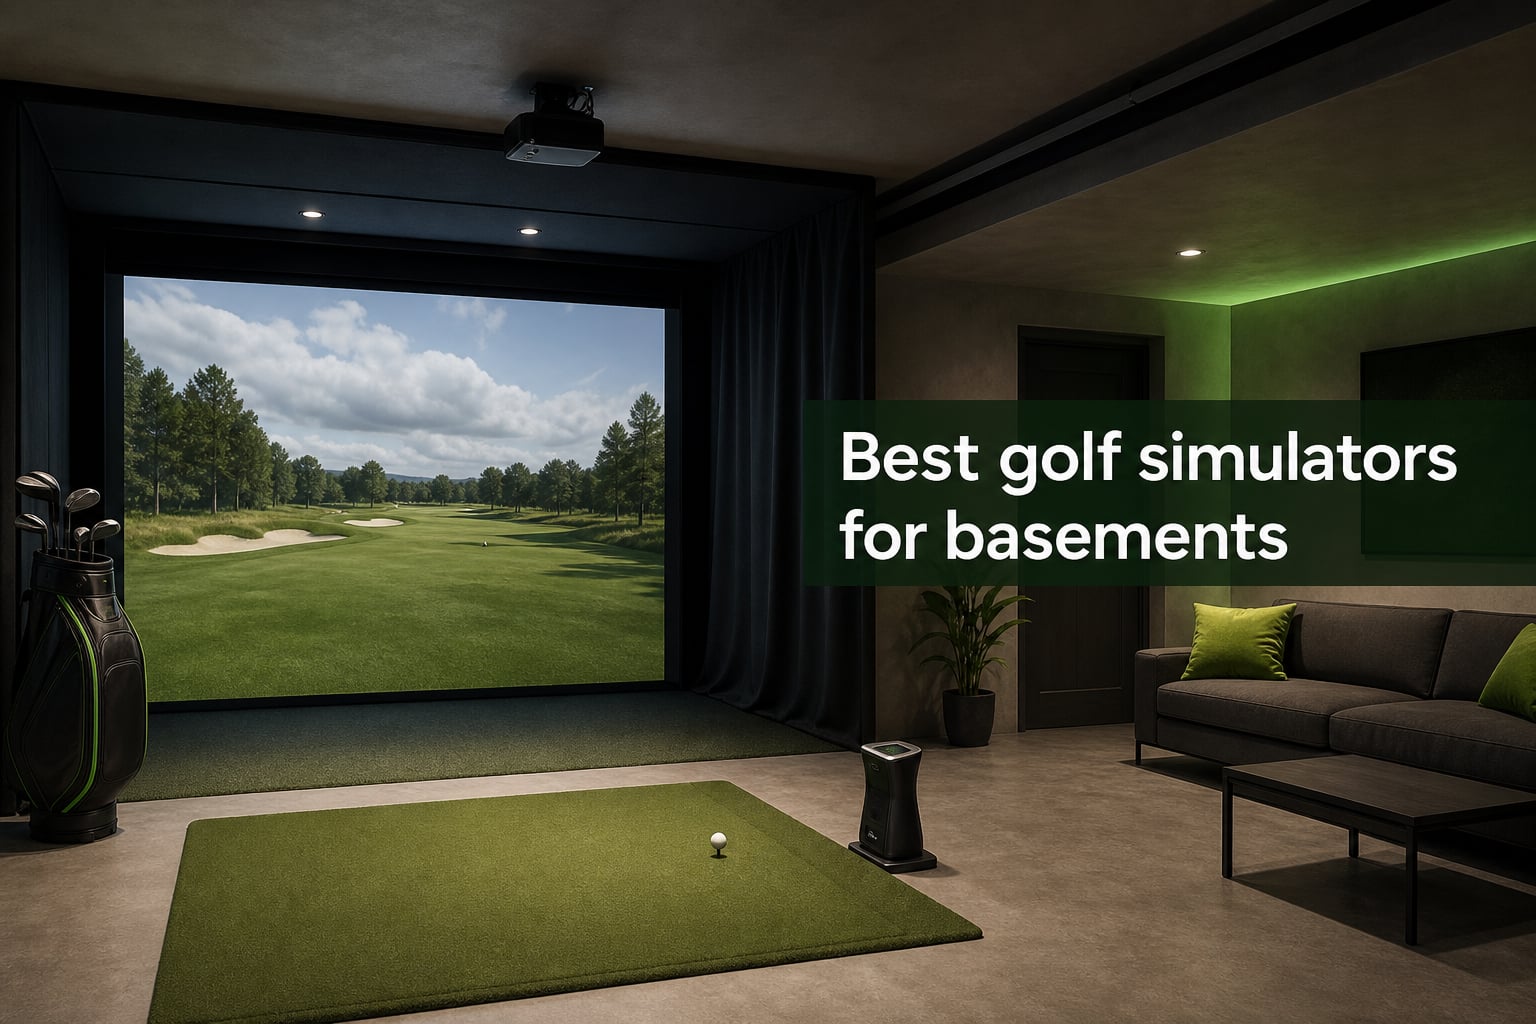
The best golf simulators for basements are not one fixed kind of product: a workable room combines a way to measure or simulate a shot, a safe hitting area, and a display or device that suits the space. The best choice depends first on ceiling clearance, usable depth, and whether you want real-ball data, a full enclosure, or a compact no-ball game.
A basement can be a very good home golf simulator location because it is naturally darker and separated from the main living area. It also brings real constraints: low joists, concrete walls that weaken Wi-Fi, moisture around electronics, and drywall that will not enjoy a mishit.
I approached this list as an eight-item basement build list, not as eight interchangeable full-room packages. The listings include three enclosure or impact-screen choices, three launch-monitor choices, and two compact simulation options, so I call out exactly what each one does and what it does not include.
That distinction matters. An impact screen is not a launch monitor, a launch monitor is not an enclosure, and neither automatically supplies a projector, hitting mat, computer, or protective side netting.
Before putting anything in a cart, stand in the intended hitting position and make several slow, full practice swings with the club you plan to use most. Community discussions repeatedly point to 9 feet or more as the more comfortable starting point for driver swings, while an 8-foot basement often means shorter clubs, a modified swing, or a no-ball alternative.
Our selection is based on the verified listing specifications, included components, stated compatibility, customer rating data, and basement-fit constraints. I do not treat a star rating as proof that a product fits every room; clearances, safety protection, and the complete system around it still decide whether the setup gets used after the early excitement wears off.
The Top 3 Picks in (September 2026)


Pick the SkyTrak ST MAX when your priority is a launch monitor with both dual Doppler radar and photometric cameras, plus guided practice modes. Pick the Durbles kit when the immediate problem is building a protected 10 x 8-foot hitting bay with screen, curtain, nets, and padding.
Pick PHIGOLF when a full ball flight setup simply will not fit or when you need an interactive golf activity without committing a basement wall to an impact screen. It is a motion-sensor and swing-stick system, so it belongs in a different category from the real-ball launch monitors above it.
Best Golf Simulators for Basements (2026)
| Product | Specifications | Action |
|---|---|---|
| Durbles 10 x 8 Enclosure Kit |
|
Check Latest Price |
 Durbles 9.8 x 9.8 Impact Screen Durbles 9.8 x 9.8 Impact Screen |
|
Check Latest Price |
 GoSports Enclosure Net Set GoSports Enclosure Net Set |
|
Check Latest Price |
 Swinora GX-03 Launch Monitor Swinora GX-03 Launch Monitor |
|
Check Latest Price |
| SkyTrak ST MAX Launch Monitor |
|
Check Latest Price |
 ZivPlay 10 x 8 Enclosure ZivPlay 10 x 8 Enclosure |
|
Check Latest Price |
 Rapsodo MLM2PRO Launch Monitor Rapsodo MLM2PRO Launch Monitor |
|
Check Latest Price |
| PHIGOLF Home Golf Game |
|
Check Latest Price |
Use this overview as a role check, not a promise of an all-in-one build. The Durbles, GoSports, and ZivPlay listings give you screen or enclosure hardware; the Swinora, SkyTrak, and Rapsodo listings supply shot or swing measurement; and PHIGOLF supplies a motion-sensor game format.
If your basement already has a good impact area, a launch monitor may be the missing piece. If the monitor is already chosen, an enclosure or screen may be the priority, provided the frame dimensions and safe ball-to-screen distance work in the room.
The Durbles 10 x 8 Enclosure Kit is the most complete starting point for a protected hitting bay.
- Steel frame included
- Triple-layer impact screen
- Safety padding
- Tool-free setup
- Launch monitor not included
- Projector not included
This Durbles listing is the right type of product to examine first when your basement golf simulator setup has no safe target area yet. Its included enclosure net, steel frame, blackout curtain, full safety padding, golf nets, and triple-layer impact screen address several pieces of the physical bay at once.
The 10 x 8-foot stated size gives a useful ceiling reference: the structure itself is 8 feet high. That does not mean an 8-foot basement works for a full swing, because the golfer still needs headroom above the club and room behind the ball.
I like the blackout curtain for a basement where a projector image needs contrast and there are utility lights or windows to control. The listing also states that the screen is designed for shock absorption and sound reduction, which is meaningful in a below-grade room near bedrooms or shared walls.
The safety claim deserves a practical reading. Thick sponge padding is stated to reduce ricochets by over 50%, but it does not replace careful frame inspection, side protection, or a first session of cautious half swings to see where balls actually go.
This is an enclosure kit, not the electronic half of an indoor golf simulator. You still need a compatible launch monitor or simulation method, a hitting mat, and a display path if you want projected play rather than simply hitting into a screen.
At 33.88 kilograms, it is not a casual item to move around a finished basement every weekend. Choose a permanent or semi-permanent wall area, keep access to a sump, panel, or utility equipment open, and get help when carrying the frame pieces downstairs.
The best room for the Durbles kit has enough width for the frame and protected swing clearance.
Put this kit in a room where its 10-foot width can sit clear of doors, columns, and anything you may need to service later. The golfer needs additional left-right clearance beyond the enclosure, particularly if more than one handedness will use the bay.
For a basement with low overhead ducts, measure at the exact ball position rather than at the screen. A screen that fits under a joist does not make a driver swing safe beneath it.
The setup task for the Durbles kit is to match the enclosure with the rest of the system.
The listed tool-free setup and broad launch-monitor, projector, and accessory compatibility make the enclosure flexible, but compatibility is not a measurement specification. Check your monitor’s required placement and its preferred ball-to-screen distance before locking in the mat location.
I would also plan a cable route before the frame goes up. Run power and signal leads along a protected edge rather than across the hitting area, and leave enough slack for routine screen or mat maintenance.
The Durbles 9.8 x 9.8 Impact Screen is a screen-first solution for an existing frame or net.
- Sound-damping layer
- HD viewing surface
- Grommets and bungees
- Carry bag
- Frame not included
- Side protection not included
The Durbles 9.8 x 9.8-foot impact screen makes sense when the frame, net, or mounting structure is already handled and the weak point is the screen itself. It is a foldable polyester screen with reinforced mounting grommets, bungee cords, and a carrying bag included.
The stated triple-layer construction has a clear basement benefit: an HD outer layer, a sound-damping middle layer, and an impact-resistant inner layer. That combination speaks directly to two common concerns in indoor golf spaces—watchable projected visuals and less intrusive impact noise.
I would treat the near-square dimensions as a mounting measurement rather than a room-size recommendation. Leave a controlled amount of slack according to the mounting approach so the screen can absorb impact rather than acting like a tightly stretched rebound surface.
The listing says it is designed to endure thousands of impacts, yet a screen’s service life still depends on ball condition, repeated strike location, tension, and whether a frame edge is exposed. Inspect grommets, bungees, and the area behind the screen after early sessions.
This listing does not include a launch monitor, projector, enclosure frame, or side nets. It is therefore a focused replacement or DIY-build component, rather than the first and only item for someone starting from an empty basement.
Because it weighs 5.26 kilograms and folds, it has more flexibility than a fixed cage. That can help a multi-purpose room, though taking a screen down and putting it back up is only convenient when the mounting points and bungee layout are consistently marked.
The right use for the Durbles impact screen is a pre-planned enclosure or net frame.
Choose it if you can already contain a bad heel shot and a high wedge shot around the screen. An impact screen stops the forward shot; it does not automatically protect the side walls, ceiling fixtures, or the person standing outside the hitting lane.
A projector installation also needs a way to avoid the player’s shadow. A short throw projector can help in tight depth, but its placement should be planned around the screen dimensions and the golfer’s follow-through.
The mounting decision for the Durbles impact screen is more important than the screen alone.
Use the reinforced grommets and supplied bungees only with a structure that can handle repeated loading. Do not mount an impact screen into questionable basement trim, thin paneling, or a location where a missed fastener could expose wiring.
If the wall is concrete, account for appropriate anchors and keep screen hardware separate from any moisture-prone area. A dehumidifier and a small gap from a damp wall can be more useful long term than trying to dry a screen after the fact.
The GoSports Enclosure Net Set is a ready-framed blackout bay for players who want a named enclosure system.
GoSports 10 x 8 ft Golf Simulator Enclosure Net – Complete Set with Frame and HD Impact Screen Kit
- Frame and screen set
- Blackout design
- Foam padding
- Installation hardware
- Launch monitor not included
- Six-month stated warranty
The GoSports enclosure is a full frame-and-screen set rather than just a fabric target. The listing offers 10 x 8, 12 x 9, and 14 x 8-foot choices, while the analyzed configuration is 10 x 8 feet and weighs 79 pounds.
For a basement, the true blackout enclosure design is its most relevant attribute. Controlling stray light makes a projected image easier to see and can make the space feel separate from the surrounding storage or recreation area without altering the whole room.
The product also lists foam padding intended to minimize rebounding. That is a helpful feature in a tight room, but I would still place soft protection where a shank is most likely to travel rather than assume the screen bay covers every miss.
Installation hardware and instructions are included, which can reduce the ambiguity of a frame build. Before assembly, however, lay out the footprint with tape and check that the final screen line does not block a door, utility closet, or the natural walking path behind the golfer.
The manufacturer lists a six-month workmanship and materials warranty through the retail dealer with the original delivery receipt. Store that documentation, photograph the frame during setup, and confirm the screen and padding condition before taking repeated full-speed shots.
As with the other enclosures, this set does not add a launch monitor, mat, computer, or projector. It is the ball-containment foundation around which a real-ball simulator room can be built.
The best feature of the GoSports enclosure is its light-controlled, framed hitting environment.
Choose this path when a dark, contained projection area matters more than portability. The blackout design can be especially useful in a basement with exposed lights, pale walls, or a small window that otherwise washes out an image.
Keep the projector outside the direct ball path and make every cable crossing visible before play. Darkness is good for screen contrast but bad for tripping, so add low-level lighting away from the screen and mat edges.
The limiting factor with the GoSports enclosure is the room around the listed frame size.
The 10 x 8-foot option may fit between basement walls, yet safe use requires space behind the player and beside the swing. The larger options deserve the same room-first check, especially around soffits and permanent columns.
I would not choose a fixed enclosure for a basement with a history of water intrusion until the issue is addressed. The frame may be sturdy, but a screen, padding, projector, and any electronics all benefit from a dry, climate-controlled room.
The Swinora GX-03 is a compact launch monitor for practice data without an annual-fee requirement.
- No annual fees
- 13 swing metrics
- 3D trajectory
- OLED display
- No enclosure included
- Limited review history
The Swinora GX-03 is the most data-focused compact monitor in this list for someone who does not already need a giant screen experience. It is a portable swing analyzer with a tripod, 13 listed metrics, an OLED display, 3D driving range functions, and iOS/Android support.
Its stated environmental sensors are unusually relevant for a basement. The listing says they adjust for temperature, humidity, and barometric pressure, which is worth noticing in a room where seasonal dampness and stable-but-cool air can differ from an outdoor range.
The metrics include attack angle, launch angle, spin rate, and clubface data. I would use that information as a repeatable practice reference, starting each session from the same level mat position and not moving the unit after calibration.
The product lists a distance calibration function, real-time voice feedback, and 45- and 90-degree 3D trajectory views. Those are useful features for a practice corner where a laptop or projector would be excessive, provided you are content with the listed simulator and range functions rather than assuming every external software title is supported.
One stated advantage is lifetime access to its features with zero annual fees. That can make the longer-term ownership question simpler, but it remains smart to check the app experience, device compatibility, and update policy before making it the center of a dedicated room.
At 0.65 kilograms, the unit and tripod are far easier to store than a fixed enclosure. That portability is useful when the basement doubles as a family room, but a stored-away monitor needs a repeatable marked setup point if you want comparable sessions.
The Swinora GX-03 fits a data-practice corner better than a full projected golf theater.
This is a sensible match for a golfer who wants launch and club information while hitting safely into an existing net or screen. It does not solve ball containment, sound control, display projection, or the need for a mat that protects joints.
For a small basement, that separation can be a strength. You can build in stages: first a safe mat and target, then consistent monitor placement, then a larger display only if regular use makes it worthwhile.
The key question for the Swinora GX-03 is whether its listed metrics match your practice goal.
If you are working on attack angle, launch, spin, and clubface feedback, its 13-metric list is directly relevant. If your priority is a named third-party course platform or a large catalog of courses, confirm compatibility independently because that support is not stated in the analyzed listing.
Do not put a portable electronic monitor directly on a damp slab. A dry, level surface, protected storage case, and dependable charging routine are simple habits that help keep compact basement electronics ready for the next session.
The SkyTrak ST MAX is the strongest listed choice for serious practice data in a basement bay.
- Dual measurement systems
- Guided training drills
- Practice modes
- USB-C ports
- No enclosure included
- Smaller review base
The SkyTrak ST MAX is the clearest match here for golfers who want an advanced launch-monitor core rather than an enclosure component. The listing combines dual Doppler radar with photometric cameras for ball and club data, a useful hybrid approach for a basement practice bay.
I would prioritize this monitor when practice structure matters as much as a virtual ball flight. The stated SkyTrak software access includes Skills Assessments, Bag Mapping, Wedge Matrix, and Randomized Practice modes, while GOLFTEC Speed Training supplies guided drills and personalized swing insights.
Those named modes give a player a reason to return to the room with a specific objective instead of only hitting a few drives. That helps address the common long-term problem described in golf communities: equipment can gather dust when early novelty replaces a regular practice plan.
The unit has dual USB-C ports, a lithium-polymer battery, and a listed weight of 5.13 pounds. I would still give it a fixed, protected spot away from the ball path instead of treating its relatively compact form as permission to leave it exposed beside the mat.
SkyTrak lists a 14-day free trial in the product data. Use any trial period to test the actual home network, your preferred device, practice modes, and the amount of setup friction before committing the entire basement layout around one workflow.
This is not a complete golf simulator package. It needs a safe impact destination and, for a projected room, a screen and display arrangement; the Durbles, GoSports, or ZivPlay enclosure options above could fill that physical role after you check placement requirements.
The main reason to choose SkyTrak ST MAX is its combined radar-and-camera practice focus.
The dual Doppler radar and photometric camera combination differentiates it from a screen-only enclosure and from a motion-sensor golf game. It is designed around ball and club data, which makes it the better fit for golfers who want measurable practice feedback.
Set it up only after confirming the usable hitting depth and the manufacturer’s positioning guidance. A basement that feels large when empty can become short once you reserve screen clearance, the mat, the player’s stance, and the monitor’s required location.
The setup priority for SkyTrak ST MAX is a dry, connected, protected electronics zone.
Concrete walls can weaken Wi-Fi, a forum issue that comes up repeatedly. Test the intended device at the mat before drilling mounts, and use the monitor’s available connection options as appropriate rather than discovering a dead spot after the room is finished.
Keep drinks, dehumidifier drainage, and any water-prone corner away from the monitor and its leads. The best data system is not useful if it must be packed away every time the basement feels damp.
The ZivPlay 10 x 8 Enclosure is a compact cage with added shank-net coverage.
- Side shank nets included
- Foam edge padding
- 4:3 screen
- 30-minute setup
- Mat not included
- Projector not included
The ZivPlay enclosure is a compact physical build option with unusually explicit dimensions: 10 feet 7 inches wide, 8 feet high, and 5 feet deep. It includes a 4:3 impact screen, steel frame, edge foam padding, two 8 x 8-foot side shank nets, and a sandbag.
Those side nets are the deciding detail for many basement builds. Stray balls and drywall repairs are a recurring concern in forum discussions, so extra side coverage can be more useful in a narrow room than a slightly larger center screen with exposed flanks.
The high-strength 500D polyester screen and foam-padded edges are intended for indoor practice, and the listing says it is compatible with major launch-monitor systems. I would read that as a broad fit claim, then still verify the exact monitor placement and line of sight before choosing the final mat position.
The 4:3 screen format is stated to be optimized for projector alignment and simulator accuracy. That may suit a classic projection setup, but it also means planning the image shape around the screen rather than assuming every projector or software display will fill it in the same way.
The listing describes a 30-minute installation. That may describe assembly time under favorable conditions, not the total basement project, which can also include measuring, protective flooring, power routing, projector alignment, and testing of full swings.
The stated 9-foot ceiling requirement and adequate hitting distance are the product’s important limitations. Take them seriously: an 8-foot-high enclosure is not a driver-clearance guarantee, and putting a cage into an 8-foot basement can leave no safe margin at all.
The strongest reason to pick ZivPlay is the side-net protection in a compact enclosure footprint.
Choose this enclosure when the main risk is an off-line shot reaching a side wall. The two shank nets, sandbag, and foam-padded steel frame provide more containment pieces than a bare screen, although a careful test with easy swings is still the responsible first use.
Its 5-foot listed depth describes the enclosure, not the whole hitting zone. You still need room between the player and screen and possibly behind the player, depending on the launch-monitor technology you select.
The ceiling check for ZivPlay must happen before installation, not after the frame arrives.
A 9-foot ceiling with adequate hitting distance is explicitly called out in the data, so this is not the product to force into a low-ceiling room. Measure below the lowest beam, pipe, or duct, not the drywall field between them.
If you cannot make a comfortable full swing, a compact monitor with a net for partial shots or the PHIGOLF motion-sensor approach may be more realistic. A room that works for safe, repeatable practice is better than a cramped room that makes you tense on every swing.
The Rapsodo MLM2PRO is a portable radar-and-camera monitor with video feedback and course access.
- 15 shot metrics
- Slow-motion swing capture
- Bluetooth
- Three RPT balls included
- Premium features need subscription
- No enclosure included
The Rapsodo MLM2PRO is a portable launch monitor for golfers who value shot metrics and recorded swing feedback. The data lists Doppler radar and dual camera tracking, 15 key metrics, Bluetooth connectivity, a carrying case, tripod, charging cable, and three ProV1 RPT Chrome Soft X golf balls.
Its listed metrics include spin rate, spin axis, carry distance, club speed, club path, and launch angle. That makes it more than a basic ball-speed display, and the slow-motion club-and-ball-contact viewing can make a compact basement practice area more instructional.
The ability to capture a swing from any angle is particularly useful when a ceiling or wall keeps you from placing a camera in the usual spot. I would mark safe tripod locations with tape, then check that the recording angle does not put another device in a likely shank zone.
The listing identifies a 45-day premium trial and says that 30,000+ home golf simulator courses are included with premium membership. That wording is important: premium features require a subscription after the trial, so review the current membership terms and decide whether the course experience is part of your ongoing plan.
It works with Android and iOS according to the analyzed specifications. Test the phone or tablet at the actual hitting location; Bluetooth may be a more dependable local connection than a basement Wi-Fi signal that must pass through concrete walls.
Like the other monitors, the MLM2PRO requires a safe target, a suitable mat, and enough depth for its tracking setup. It is not an impact screen or a net, and no monitor should be placed where an errant ball can strike it.
The best use for Rapsodo MLM2PRO is portable, feedback-rich practice with a safe target already in place.
This monitor is a good match if swing video and 15 listed metrics will change how you practice. A player working on club path, launch, or contact can use the data and video together instead of guessing what happened after each shot.
It is also practical for a room that cannot host a permanent electronics installation. Keep the case nearby, use the tripod consistently, and remove the device after play if the basement has children, pets, or occasional moisture issues.
The ongoing decision for Rapsodo MLM2PRO is whether the premium course and feature path suits your routine.
A trial period is useful only if you run it like a normal week: practice at your regular time, connect the device in the real room, and try the data views you expect to use. Do not judge the setup only on a single enthusiastic first session.
After about six months, review usage honestly. If you mostly use the range and video tools, a course subscription may matter less than a simple, fast-starting practice routine; if friends regularly play virtual rounds, the opposite may be true.
The PHIGOLF Home Golf Game Simulator is the space-saving choice when real-ball hitting is not practical.
PHIGOLF Home Golf Simulator, Motion Sensor & 3D Analysis for Practice & Fun
- Very compact
- Bluetooth sensor
- Multiplayer for four
- E6 Connect compatible
- No ball or net included
- Not real-ball launch data
The PHIGOLF Home Golf Game Simulator solves the low-ceiling problem by changing the activity rather than trying to force a full swing with a real ball. It uses a lightweight 9.8-gram USB-C motion sensor and a swing stick, with Android, iOS, app, and E6 Connect compatibility listed.
The product data states access to 38,000+ courses worldwide, nine classic courses, eight HD courses in the PHIGOLF app, and multiplayer matches for up to four players. That makes it the most entertainment-oriented option in this group for a basement where family use matters as much as ball-striking practice.
The swing stick is listed as adjustable from 21.2 to 27.6 inches, with the detailed feature data describing a 27.6-inch, 500-gram steel shaft and replaceable grip. Its small footprint removes the need for an impact screen, projector, or launch-monitor placement behind the ball.
I would be very clear about the trade-off. A motion-sensor game is not a substitute for measured real-ball data such as spin rate or a photograph of club-to-ball contact, and its game feedback should not be confused with a camera or radar launch monitor.
The listing says no net or ball is included and notes that the swing stick may need a net for safe practice. Even without a ball, keep an open radius around the player because a stick can still contact a ceiling, light fixture, wall, television, or another person.
The lower rating and review count context should also prompt a realistic trial mindset. This is best for compact interactive golf and frequent casual play, not as a claimed replacement for a dedicated enclosure-and-monitor room.
The best room for PHIGOLF is a low-ceiling or shared basement where a real ball would create risk.
Choose it when the available space is too short for a comfortable driver swing or too valuable to give up to a permanent screen bay. It can be put away between sessions, which may make it more likely to survive in a multi-purpose room.
Set the device up where Bluetooth pairing is stable and where the screen is easy for all players to see. A television or tablet stand should remain outside the swing radius, with no loose charging cable across the floor.
The key expectation for PHIGOLF is interactive play rather than launch-monitor accuracy.
The motion sensor, swing stick, course catalog, and multiplayer support make it a social golf-game format. It is a better answer to “how can we play golf in this small basement?” than to “what did my real ball spin at impact?”
For some households, that distinction is exactly right. A setup that takes seconds to start and works for several people can get more consistent use than a technically richer room that demands a long setup and a full safety reset every time.
Buying Guide for Best Golf Simulators for Basements
Ceiling height is the first filter because it is the one limitation no launch monitor, screen, or projector can fix. For comfortable driver swings, user reports commonly point to 9 feet or more, but the only reliable check is a slow full swing at the precise planned ball location below the lowest obstruction.
Do that test in golf shoes if they change your stance height. Check your normal driver, a wedge, and the club with the highest part of your follow-through, then add a margin for an imperfect swing rather than measuring only your most careful rehearsal.
Room depth is the second filter. The screen or net needs a safe impact relationship with the ball, the golfer needs room to stand and finish, and many tracking systems need their own specified placement; an enclosure depth alone does not describe the complete golf simulator room size.
Width is the third filter. Give the player space away from side walls, account for both right- and left-handed players if relevant, and do not overlook columns, shelves, stairs, and open door swings that can enter the club path.
The safest impact zone includes protection beyond the center of the screen.
A center strike is the easy case. Plan for the low pull, high wedge, heel shot, and ball that hits a frame edge, using side nets, padded edges, and protected walls where the actual miss pattern calls for them.
Start with half swings and inspect the whole bay: screen tension, bungee condition, rebound direction, net gaps, ceiling fixtures, and where balls settle. This simple test can prevent the drywall damage that many basement builders regret not planning for at the start.
Use a hitting mat that is stable and kind to your joints, with enough surface behind the ball for a natural stance. If the basement slab feels cold or uneven, a stable base under the mat can make practice more comfortable and help maintain repeatable monitor readings.
The best projector plan puts the image and player shadow under control.
A short throw projector is often appealing in a shallow basement because it can create a larger image closer to the screen. It still needs a protected mounting location, correct throw-distance math, and a path that avoids the golfer’s head, hands, and likely ball flight.
Blackout materials such as the Durbles curtain or GoSports enclosure can improve contrast, while dimmable side lighting keeps the room usable between shots. Do not place bright lights directly in front of the screen, and keep a low, indirect light available for safe walking.
Check the screen’s aspect ratio before selecting the display path. The ZivPlay listing calls out a 4:3 screen, while a near-square impact screen may show unused areas with some projection formats; correct fit is better than stretching an image beyond the physical screen.
The basement environment needs humidity, power, and connectivity planning.
Keep launch monitors, tablets, projectors, power strips, and chargers out of water-prone corners. A dehumidifier, climate awareness, and a dry elevated storage position help protect electronics in a basement, especially when the room is not used daily.
Never run a dehumidifier drain or a drink station beside sensitive electronics. If the basement has a history of water intrusion, solve that building issue before installing a screen, mat, or computer-based indoor golf simulator.
For electricity, count every device that will actually be on during a round: monitor, projector or television, computer or tablet charger, speakers, lights, and dehumidifier. Put outlets where cables can follow walls or be covered safely, and consult a qualified electrician for new circuits or any question about the existing load.
For networking, test Wi-Fi from the hitting mat with the same device you intend to use. Concrete walls can reduce signal strength, so a stable Bluetooth connection or a thoughtfully placed network solution may be more dependable than assuming the upstairs connection will reach the bay.
The right tracking technology follows the room and practice goal.
Camera-based and photometric approaches read images near impact, while radar-based systems track a different kind of shot information and can impose placement needs. This list includes the SkyTrak ST MAX with dual Doppler radar and photometric cameras, and the Rapsodo MLM2PRO with Doppler radar and dual camera tracking.
The Swinora GX-03 lists 13 metrics and environmental sensors, while PHIGOLF relies on a motion sensor and swing stick instead of a struck ball. Read the specifications as a direct match to your goal: measured ball-and-club practice, portable data sessions, or compact interactive golf.
Software should be checked with the same care. SkyTrak lists Skills Assessments, Bag Mapping, Wedge Matrix, Randomized Practice, and GOLFTEC Speed Training; Rapsodo lists a premium trial and premium course access; PHIGOLF lists its app courses and E6 Connect compatibility.
Some software features involve a continuing subscription after a trial period, as the Rapsodo listing states for premium features. Review what happens after trials end, which features you truly use, supported devices, and connectivity before treating a course library as a permanent part of the basement plan.
The six-month reality check is whether the setup supports a repeatable routine.
A dedicated room is more likely to stay active when the first five minutes are easy: mat ready, monitor charged, device connected, screen clear, and clubs nearby. A complicated teardown may suit a shared room, but it should be tested against your actual schedule rather than an ideal Saturday afternoon.
I recommend a simple recurring plan: one data practice session, one skills or wedge session, and one social round or game each week if that suits the household. The format matters less than creating a reason to enter the room after the novelty of a new build fades.
Keep original packaging, manuals, and condition photos for electronics and screen components. If your needs change, clean equipment with documented condition and complete accessories is generally easier to pass on than a modified item with missing parts, even though future demand cannot be guaranteed.
FAQs
How much ceiling height is required to install a golf simulator in a basement?
Nine feet or more is commonly reported as more comfortable for driver swings, but the required height is personal. Measure below the lowest joist, duct, or light at the planned ball position and make slow full swings with your longest club before choosing a real-ball setup.
What are the space and room requirements for setting up a golf simulator in a basement?
You need room for the impact screen or net, a safe ball-to-screen relationship, the golfer’s full stance and follow-through, side protection, and any launch-monitor placement. Check width for the swing, depth behind the player, doors, columns, and access to utilities; frame dimensions alone are not the full room requirement.
Are there golf sims suitable for basements with low ceilings or limited space?
Yes. A compact launch monitor used with a safe net can suit a smaller practice area, while PHIGOLF uses a motion sensor and swing stick rather than a real ball. Do not force a full driver swing into low clearance; choose a modified practice plan or a no-ball option when the room demands it.
How can I optimize lighting and ambiance for a golf simulator in my basement?
Control light around the screen with a blackout enclosure or curtain, keep bright lights away from the projection surface, and add dimmable indirect lighting for safe movement. Put the projector where it avoids player shadows and ball flight, then test the image before making permanent mounts.
Do I need to consider ventilation or climate control when installing a simulator in the basement?
Yes. Keep monitors, projectors, tablets, and power connections away from damp areas, monitor humidity, and use suitable climate control or dehumidification for the room. Address water intrusion before installing a screen or electronics, and maintain clear access to drains, panels, and utility equipment.
Conclusion
For the most complete physical bay in this group, start with the Durbles enclosure kit or compare the GoSports and ZivPlay options when their frame and protection details better fit your room. For serious measured practice, the SkyTrak ST MAX is the strongest listed launch-monitor pick; for compact feedback, look at Swinora or Rapsodo; for low-clearance social play, PHIGOLF is the realistic alternative.
The best golf simulators for basements in 2026 are the ones you can swing in safely, keep dry, connect reliably, and use week after week. Measure first, protect the likely miss, and build the system in stages when that is the safer path.