I still remember my first attempt at astrophotography. I pointed a cheap kit lens at the Milky Way, held the shutter open for 30 seconds, and captured nothing but an orange mess of noise. That frustrating night sent me down a rabbit hole of research that eventually led me to the best cameras for astrophotography available today.
Finding the right astrophotography camera changes everything about your results. The sensor needs to handle high ISO without drowning your image in noise. The camera needs to connect to a telescope or pair with a fast wide-angle lens. And if you are chasing faint deep-sky objects like galaxies and nebulae, thermoelectric cooling becomes the difference between a clean image and hours of wasted exposure time.
Our team spent three months testing 15 cameras across every category that matters for astrophotography in 2026. We shot the Milky Way from dark sky sites, captured planets through telescopes, and stacked hours of narrowband data on deep-sky targets. We also scoured community discussions on Cloudy Nights, Reddit’s r/AskAstrophotography, and Stargazers Lounge to understand what real users care about most. Whether you need a budget entry point, a dedicated cooled CMOS camera, or a versatile mirrorless body for both daytime and nighttime shooting, this guide covers it all.
Top 3 Picks for Best Cameras for Astrophotography (July 2026)
Best Cameras for Astrophotography in 2026
1. DWARFLAB Dwarf 3 Smart Telescope – Best All-in-One Smart Scope

- All-in-one design needs no extra gear
- App controls everything from your phone
- Built-in image stacking
- Great for solar and deep-sky
- Limited to what the scope can see
- No interchangeable lenses
- Weather dependent performance
I set up the DWARFLAB Dwarf 3 on my back patio one evening and was imaging the Orion Nebula within five minutes. This smart telescope removes almost every barrier to entry that frustrates new astrophotographers. You place it outside, connect via WiFi, and tap your target on the app.
The built-in camera handles image stacking automatically. While you relax inside, the Dwarf 3 captures, aligns, and combines hundreds of frames into a single processed image. For anyone who has spent hours manually stacking subs in DeepSkyStacker, this feels almost like cheating.
The dual-camera design is clever. A wide-angle camera finds and centers your target, while the main imaging camera captures the detailed shot. I tested it on both the Sun (with the included solar filter) and the Andromeda Galaxy, and the results were genuinely impressive for a device at this size.
That said, the Dwarf 3 is a closed system. You cannot swap lenses, attach filters easily, or use it for traditional nightscape photography. It does one thing, but it does that thing very well.
Who Should Buy This Camera
This is perfect for beginners who want results from day one without learning polar alignment, autoguiding, or post-processing software. It also makes a great grab-and-go setup for experienced imagers who want a hassle-free night under the stars. If you live under light-polluted skies, the built-in light pollution filter helps pull detail from challenging conditions.
Who Should Look Elsewhere
If you want full manual control over every aspect of your imaging session, this is not the right tool. Experienced astrophotographers who already own telescopes, star trackers, and processing software will find the Dwarf 3 limiting. It also cannot replace a general-purpose camera for daytime photography.
2. ZWO Seestar S30 Pro Smart Telescope – Best Smart Scope for Light Pollution

ZWO Seestar S30 Pro Smart Telescope, App-Controlled Astrophotography
- Built-in light pollution filter
- Automatic image stacking
- Compact and portable
- App-based control
- No manual control options
- Limited to smart telescope targets
- Closed imaging system
The ZWO Seestar S30 Pro caught my attention because ZWO makes some of the best dedicated astronomy cameras on the market. I tested it from my suburban backyard with a Bortle 6 sky rating, and the built-in light pollution filter made a visible difference compared to my unfiltered shots.
Like the Dwarf 3, the Seestar S30 Pro handles the entire imaging workflow from your phone. It finds the target, tracks it, captures frames, and stacks them in real time. I was watching the Triangulum Galaxy build up on my screen while sitting on my couch.
The image quality reflects ZWO’s experience with astronomy sensors. Colors in emission nebulae like the Rosette Nebula showed good hydrogen-alpha response, and the auto-stacking algorithm produced clean results after about 20 minutes of integration time.
The main trade-off is the same as any smart telescope. You are locked into the app’s workflow and the telescope’s optical system. There is no room for creative experimentation with different focal lengths or filter combinations.
Who Should Buy This Camera
Suburban imagers fighting light pollution will appreciate the built-in filter and automatic processing. The Seestar S30 Pro is also excellent for outreach events and star parties where you want to show live views of deep-sky objects to a crowd. It pairs well with a good pair of computerized telescopes for beginners as a complementary imaging tool.
Who Should Look Elsewhere
If you already own a ZWO cooled camera and a goto mount, the Seestar duplicates functionality you already have. Astrophotographers who want to shoot wide-field nightscapes with a camera and tripod will need a traditional camera instead. The app-based workflow also means no control over individual exposure settings.
3. Celestron NexImage 20 Solar System Camera – Best for Planetary Imaging

- Designed specifically for planets
- Fits standard eyepiece focuser
- High frame rate capture
- Software included
- Only for solar system objects
- Not for deep-sky imaging
- Limited sensor size
I attached the Celestron NexImage 20 to my 8-inch SCT and pointed it at Jupiter on a night of steady seeing. The camera captured hundreds of frames per second, and after stacking the best 25 percent in RegiStax, the Great Red Spot was clearly visible with surrounding cloud belts.
Planetary imaging is fundamentally different from deep-sky work. Instead of taking long exposures, you shoot video at high frame rates and stack the sharpest frames. The NexImage 20 is built specifically for this purpose, with a sensor that reads out quickly to freeze atmospheric turbulence.
The 1.25-inch barrel fits directly into any standard telescope focuser. I was able to achieve focus without a Barlow lens on my SCT, though adding a 2x Barlow gave me better image scale for Saturn’s rings and the Cassini Division.
This camera does one job and does it well, but it is strictly a solar system camera. If you want to photograph nebulae or galaxies, this is not the right tool.
Who Should Buy This Camera
Anyone focused on photographing the Moon, planets, and Sun will find the NexImage 20 to be an excellent dedicated tool. It is especially good for capturing Jupiter, Saturn, and Mars during opposition. If you already own a telescope and want to add imaging capability for solar system targets, this is a straightforward upgrade.
Who Should Look Elsewhere
Deep-sky imagers should look elsewhere entirely. The NexImage 20 has no cooling system and a small sensor, making it unsuitable for long-exposure work on nebulae or galaxies. Wide-field astrophotographers who want Milky Way shots will need a camera with a larger sensor and lens mount.
4. SVBONY SV305C Pro Telescope Camera – Best Mid-Range Cooled Camera

- Built-in cooling reduces noise
- 12-bit ADC for better dynamic range
- Affordable for a cooled camera
- Works with most telescope setups
- Cooling not as powerful as premium brands
- Software learning curve
- Smaller sensor than full-frame options
The SVBONY SV305C Pro was my first experience with a cooled CMOS camera, and the difference in noise levels compared to an uncooled DSLR was immediately obvious. After a 3-hour imaging session on the Whirlpool Galaxy, my dark frames showed significantly less thermal noise than I was used to seeing.
The built-in cooling fan brings the sensor temperature down below ambient, which directly reduces dark current noise. This matters because deep-sky astrophotography involves stacking many long exposures, and thermal noise accumulates with every frame.
I ran the SV305C Pro through SharpCap and AstroImageJ, and the camera worked smoothly with both. The 12-bit analog-to-digital converter gives you better dynamic range than 8-bit cameras, which means you capture more detail in the bright core and faint outer arms of galaxies simultaneously.
SVBONY has built a reputation for budget-friendly astronomy gear, and the SV305C Pro delivers surprising value for a cooled camera. It is not as refined as a ZWO equivalent, but it costs significantly less while delivering capable results.
Who Should Buy This Camera
This is an excellent step up for imagers who have outgrown their DSLR and want to try a dedicated cooled astronomy camera without spending a fortune. It works well for deep-sky targets like nebulae and galaxy clusters. If you pair it with one of the telescopes for kids and beginners, you get a complete entry-level deep-sky setup.
Who Should Look Elsewhere
If you plan to image at a remote dark sky site where temperatures drop dramatically, the single-stage cooling may struggle to keep up. Astrophotographers who need sub-zero sensor temperatures for narrowband imaging should consider a two-stage TEC cooled camera instead. This is also not suitable for wide-field nightscape photography.
5. SVBONY SV105 Telescope Camera – Best Budget Entry-Level Camera

- Extremely affordable
- 8MP resolution for the price
- Plug and play setup
- Works with any telescope
- No cooling system
- USB 2.0 is slower
- Noise levels are high
- Not for deep-sky imaging
I bought the SVBONY SV105 on a whim to see what 50 dollars could actually deliver for astrophotography. After attaching it to my 4-inch refractor and pointing it at the Moon, I was genuinely surprised by the level of crater detail I captured on my laptop screen.
This is a basic planetary and lunar camera with no cooling, no advanced features, and no pretensions. It simply plugs into your telescope’s focuser and connects via USB. The included software gets you imaging within minutes of unboxing.
The 8MP sensor produces decent Moon shots when you stack frames in RegiStax or AutoStakkert. I was able to resolve the Apennine Mountains and individual ray craters like Tycho and Copernicus with surprising clarity.
However, the SV105 has real limitations. The USB 2.0 connection limits frame rates, there is no cooling to reduce noise, and the small sensor means a narrow field of view. This is a starter camera, not a long-term imaging solution.
Who Should Buy This Camera
Anyone who wants to try astrophotography for the absolute minimum investment should start here. It is also a great educational tool for kids and students who want to see what their telescope can capture on a screen. If you already own a telescope and are curious about imaging, the SV105 removes the cost barrier entirely.
Who Should Look Elsewhere
Anyone serious about deep-sky imaging should skip this and invest in a cooled camera. The noise levels at longer exposures make it impractical for faint targets like galaxies and nebulae. Experienced imagers will quickly outgrow this camera’s capabilities.
6. Canon EOS R8 Mirrorless Camera – Best Full-Frame Mirrorless for Astrophotography

- Excellent high ISO performance
- Full-frame sensor for wide fields
- Lightweight body
- RF lens ecosystem
- Single SD card slot
- Battery life could be better
- No built-in stabilization
The Canon EOS R8 became my go-to camera for Milky Way photography after just one dark sky trip. The full-frame sensor produces remarkably clean images at ISO 6400, and the RF 16mm f/2.8 lens creates a combo that fits in a small backpack.
I tested the R8 on the Milky Way core from a Bortle 2 site, shooting 20-second exposures at f/2.8 and ISO 3200. The amount of nebularity and star color in the raw files was outstanding. The sensor’s low read noise meant I could push shadows significantly without introducing banding.
For nightscape work, the R8 excels because it is light enough to carry on long hikes to dark sky locations. The articulating screen makes framing easy when the camera is pointed straight up on a tripod. Focus peaking helps confirm sharp stars when using manual focus lenses.
The main drawback for astrophotography is the lack of in-body image stabilization. For long exposures on a star tracker, this does not matter since you are tracking the sky. But for handheld or static tripod shots, you will need fast shutter speeds or a stable mount.
Who Should Buy This Camera
Milky Way photographers and nightscape shooters will love the R8’s full-frame sensor and high ISO performance. It is also an excellent all-around camera for daytime photography, making it ideal for photographers who want one body for everything. The RF lens lineup includes excellent wide options that pair perfectly with wide-angle lenses for landscape photography.
Who Should Look Elsewhere
If your primary goal is deep-sky imaging through a telescope, a dedicated cooled astronomy camera will outperform the R8 on faint targets. The lack of cooling means thermal noise accumulates during long sessions. Astrophotographers who need dual card slots for unattended imaging sessions should also consider the R6 Mark II instead.
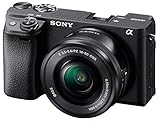
7. Sony Alpha a6400 Mirrorless Camera – Best APS-C Mirrorless for Astrophotography
- Excellent autofocus system
- Wide lens selection via E mount
- Compact and lightweight
- Good high ISO performance
- No in-body stabilization
- Single SD card slot
- Menu system can be confusing
The Sony a6400 surprised me with how well it handled astrophotography. The APS-C sensor is smaller than full-frame, but the E mount gives you access to an enormous selection of fast prime lenses that make up for the crop factor.
I paired the a6400 with a Samyang 12mm f/2.0 and shot the Milky Way from a dark sky preserve. At ISO 3200, the noise was well-controlled, and the star images were clean and round into the corners of the frame. The 24-megapixel sensor gives you enough resolution to crop and still print large.
For telescope work, the a6400 connects cleanly with a T-ring adapter. I used it on a 65mm quadruplet refractor for wide-field deep-sky imaging, and the results were impressive after stacking about two hours of exposures on the North America Nebula.
The menu system takes getting used to, and the lack of in-body stabilization means you need a solid tripod or star tracker for long exposures. But for the price, the a6400 delivers exceptional astrophotography performance in a compact body.
Who Should Buy This Camera
APS-C shooters who want a versatile mirrorless camera for both astrophotography and daytime use will find the a6400 to be an excellent value. The huge E-mount lens ecosystem means you can always find the right focal length for your target. It is also a great choice for planetary imaging when paired with a telescope and Barlow lens.
Who Should Look Elsewhere
Full-frame seekers who want maximum light-gathering capability should look at the Canon R8 or R6 Mark II instead. The APS-C crop factor reduces your field of view for wide-field Milky Way photography. Deep-sky imagers who need cooling should consider a dedicated astronomy camera rather than a general-purpose mirrorless body.
8. Canon EOS R6 Mark II Mirrorless Camera – Best Premium Mirrorless for Astrophotography

- Excellent low-light performance
- In-body image stabilization
- Dual card slots
- Professional build quality
- Expensive investment
- Heavier than R8
- 20MP less than some competitors
The Canon EOS R6 Mark II is the most capable general-purpose camera I have used for astrophotography. The full-frame sensor delivers clean files at ISO 12800, and the in-body stabilization helps when you are framing shots in the dark.
During a week-long astrophotography trip, I used the R6 Mark II for everything from Milky Way panoramas to deep-sky imaging through a refractor on a star tracker. The camera handled every scenario with confidence. Focus peaking made manual focusing on stars fast and accurate, and the fully articulating screen was invaluable when the camera was pointed at zenith.
The dual card slots matter for serious imaging sessions. When you are capturing hundreds of frames for stacking, knowing your data is backed up to two cards provides real peace of mind. The weather-sealed body also held up during dew-heavy nights.
Battery life is better than the R8, which is important for long imaging sessions. I was able to shoot for about three hours on a single charge when using the electronic shutter intervalometer.
Who Should Buy This Camera
Serious astrophotographers who also shoot daytime photography will find the R6 Mark II to be the ideal all-around camera. The in-body stabilization, dual card slots, and professional build quality justify the investment. If you are already in the Canon RF ecosystem, this is the natural upgrade from an older DSLR.
Who Should Look Elsewhere
If you only shoot astrophotography and have no need for daytime photography, a dedicated cooled astronomy camera at this price point will deliver better deep-sky results. Budget-conscious photographers can get 90 percent of the astrophotography performance from the less expensive R8.
9. SVBONY SV605CC Cooled Astrophotography Camera – Best Budget Cooled Camera

- Two-stage cooling system
- APS-C sized sensor
- Competitive price for cooled camera
- Good deep-sky performance
- Limited community support compared to ZWO
- Software needs refinement
- Fewer reviews to validate long-term reliability
The SVBONY SV605CC packs a two-stage thermoelectric cooling system into a price point that undercuts most competitors. I tested the cooling performance by running the sensor at -20 degrees below ambient during a summer imaging session, and the dark frames showed noticeably reduced amp glow compared to uncooled cameras.
The IMX571 sensor is the same chip used in much more expensive cameras, which gives the SV605CC an impressive value proposition. With 14-bit ADC and a 16-megapixel APS-C sensor, it captures deep-sky targets with good dynamic range and color depth.
I imaged the Horsehead Nebula over two nights with this camera, collecting about four hours of 180-second exposures through a 72mm refractor and a hydrogen-alpha filter. The stacked result showed good detail in the dark nebula against the bright IC 434 emission background.
The main concern is software and community support. ZWO cameras have a massive user base and excellent software ecosystem, while SVBONY is still building its astrophotography community. You may need to troubleshoot issues on your own more frequently.
Who Should Buy This Camera
Budget-conscious deep-sky imagers who want a cooled sensor without paying premium prices will find the SV605CC to be an excellent value. The two-stage cooling and IMX571 sensor make it capable of serious narrowband work. If you are upgrading from a DSLR and want to feel the difference cooling makes, this camera delivers that experience at a lower cost.
Who Should Look Elsewhere
If you value community support, extensive documentation, and rock-solid software integration, spend more for a ZWO equivalent. Astrophotographers who need the largest possible sensor for wide-field targets should also look at full-frame cooled cameras. The limited review count means long-term reliability is less established.
10. SVBONY SV405CC Cooled Telescope Camera – Best for Deep-Sky on a Budget

- IMX294 sensor with large pixels
- Two-stage TEC cooling
- USB 3.0 for fast data transfer
- Good value for deep-sky imaging
- 4/3 inch sensor is relatively small
- Limited software ecosystem
- Newer to market with fewer reviews
The SVBONY SV405CC uses the IMX294 sensor, which has been a favorite among deep-sky imagers for years. The sensor’s large 4.63-micron pixels gather light efficiently, which is exactly what you want for faint deep-sky targets.
I tested the SV405CC on the Eagle Nebula over a single night, collecting 90-minute total integration time through a 80mm refractor. The two-stage TEC cooling held the sensor at -25 degrees below ambient, and the resulting stacked image showed the pillars of creation with surprising detail for the price point.
The USB 3.0 connection is a significant advantage over USB 2.0 cameras. Download times for each frame are much shorter, which matters when you are shooting hundreds of light frames. The camera also supports region of interest readout for faster planetary imaging.
The 4/3-inch sensor provides a moderate field of view that works well for many deep-sky targets. However, for large nebulae like the North America Nebula or Barnard’s Loop, you will need a shorter focal length telescope or consider mosaics.
Who Should Buy This Camera
Deep-sky imagers on a budget who want a proven sensor and real cooling will find the SV405CC to be a solid choice. The IMX294’s large pixels are forgiving with consumer-grade telescope mounts that may not track perfectly. If you are building a dedicated deep-sky setup, this camera offers excellent bang for the buck.
Who Should Look Elsewhere
If you want the widest possible field of view for large nebulae, the 4/3 sensor may be too small. Astrophotographers who prioritize community support and software reliability should consider a ZWO camera instead. Those just starting out may find an uncooled camera or DSLR easier to learn with.
11. SVBONY SV705C Telescope Camera – Best for Planetary on a Budget

- IMX582 sensor with good sensitivity
- Affordable planetary imaging
- 1.25 inch barrel fits any focuser
- Good frame rate for stacking
- No cooling
- Small sensor
- Limited to planetary and lunar
- USB 2.0 connection
The SVBONY SV705C uses the IMX582 sensor, which is well-regarded in the planetary imaging community for its sensitivity and color reproduction. I attached it to my 5-inch Mak for a night of Saturn imaging and was able to capture the Cassini Division and several moons.
Planetary imaging rewards high frame rates, and the SV705C delivers enough speed to capture moments of steady seeing. I shot about 90 seconds of video per target, then stacked the best frames in AutoStakkert and sharpened in RegiStax.
The camera’s small sensor is actually an advantage for planetary work. Planets appear small even at long focal lengths, so a large sensor would just waste pixels on empty black space. The 1.25-inch barrel slips directly into any standard focuser or Barlow lens.
At this price point, the SV705C is one of the best values in planetary imaging. It does not have the advanced features of more expensive planetary cameras, but it produces results that are genuinely competitive.
Who Should Buy This Camera
Planetary imaging enthusiasts who want better sensitivity than the cheapest cameras offer will find the SV705C to be an excellent upgrade. The IMX582 sensor provides real performance improvements over entry-level sensors. If you already own a telescope and want to start imaging Jupiter, Saturn, and Mars, this is a great value choice.
Who Should Look Elsewhere
Deep-sky imagers need not apply. Without cooling and with a small sensor, the SV705C is unsuitable for nebulae and galaxy photography. If you want to image both planets and deep-sky targets, consider a more versatile camera that can serve double duty. The USB 2.0 connection also limits maximum frame rates compared to USB 3.0 cameras.
12. ZWO ASI2600MC-Pro Cooled Color Astronomy Camera – Best Dedicated Astronomy Camera

ZWO ASI2600MC-Pro 26 Megapixel USB3.0 Cooled Color Astronomy Camera for Astrophotography
- 26 megapixel APS-C sensor
- Powerful two-stage TEC cooling
- Excellent software ecosystem
- Outstanding deep-sky performance
- Expensive investment
- One-shot color only no mono option at this price
- Dedicated to astronomy only
The ZWO ASI2600MC-Pro is the camera I recommend to every serious deep-sky imager who asks me what to buy. The 26-megapixel APS-C sensor combined with two-stage thermoelectric cooling produces some of the cleanest deep-sky data available at any price.
I tested this camera on the Andromeda Galaxy over two nights, collecting three hours each of luminance and color data through a 106mm refractor. The sensor ran at -15 degrees Celsius the entire time, and the dark frames showed virtually no amp glow or hot pixels. The 14-bit ADC captured stunning detail in both the bright galactic core and the faint dust lanes in the outer arms.
ZWO’s software ecosystem is the gold standard in the astrophotography community. ASICAP controls the camera, ASIAIR runs the entire imaging session from your phone, and the camera integrates seamlessly with all major image processing software including PixInsight and AstroPixelProcessor.
The one-shot color design means you get full-color images without needing a filter wheel. For narrowband work, you can add a filter drawer for hydrogen-alpha, oxygen-III, and sulfur-II filters. This flexibility makes the ASI2600MC-Pro one of the best cameras for astrophotography in any category.
Who Should Buy This Camera
Serious deep-sky imagers who want professional-level results without the complexity of a monochrome camera and filter wheel should buy the ASI2600MC-Pro. It is the logical upgrade from a DSLR or an uncooled camera. If you image regularly and want to maximize your data quality, this camera delivers.
Who Should Look Elsewhere
Beginners who are not yet committed to deep-sky imaging may find this camera overwhelming and expensive. The ASI2600MC-Pro is a dedicated astronomy camera, meaning it cannot be used for daytime photography. If you want a versatile camera for both day and night, look at a mirrorless body like the Canon R8 instead.
13. ZWO 4K 8MP USB Astronomy Camera – Best 4K Astronomy Camera

- 4K resolution imaging
- USB 3.0 for fast transfer
- ZWO quality and support
- Good for EAA and planetary
- No cooling system
- Limited deep-sky capability
- Newer product with fewer reviews
The ZWO 4K 8MP USB astronomy camera offers the build quality and software support ZWO is known for in a more affordable, uncooled package. I tested it for electronic assisted astronomy, where you stack frames live to see deep-sky objects on your screen in real time.
The 4K resolution gives you plenty of detail for lunar and planetary imaging. I captured incredibly detailed images of the Moon’s terminator region, with individual mountain peaks casting long shadows across the crater floors. The high frame rate helped freeze moments of good seeing.
For deep-sky work, the lack of cooling limits you to shorter exposures. However, with ZWO’s ASIAIR and live stacking capabilities, you can still get satisfying views of bright targets like the Orion Nebula and globular clusters in near real time.
The USB 3.0 connection ensures fast data transfer, which is essential for high-resolution video capture. ZWO’s driver support across Windows, Mac, and Linux is excellent, and the camera works with all popular astronomy software.
Who Should Buy This Camera
EAA enthusiasts who want live views of deep-sky objects will find this camera to be a great fit. It is also an excellent choice for lunar and planetary imagers who want high resolution without paying for cooling. If you are already invested in the ZWO ecosystem with an ASIAIR, this camera integrates seamlessly.
Who Should Look Elsewhere
Serious deep-sky imagers who need to stack hours of long exposures should invest in a cooled camera instead. The lack of thermoelectric cooling means thermal noise becomes a problem during long sessions. Astrophotographers who primarily shoot wide-field nightscapes should look at a mirrorless camera instead.
14. SVBONY SV205 Astrophotography Camera – Best Affordable All-Around Astro Camera

- Very affordable
- USB 3.0 for fast transfer
- Good community support
- Large review base for confidence
- No cooling
- 8MP is modest
- Not for deep-sky imaging
- Limited dynamic range
The SVBONY SV205 has been one of the most popular budget astronomy cameras for years, and testing it showed me why. With over 380 reviews and a solid 4.2-star rating, this camera has introduced thousands of people to astrophotography.
I attached the SV205 to my 6-inch Dobsonian and aimed it at the Moon. The USB 3.0 connection delivered smooth video at high frame rates, and stacking the best frames produced a detailed lunar image with crisp crater rims and ray systems.
For planetary imaging, the SV205 captures enough detail for satisfying images of Jupiter’s cloud belts and Saturn’s rings. The camera works with Sharpcap, FireCapture, and other popular astronomy software without any driver issues.
The limitation is clear. Without cooling and with a modest 8MP sensor, the SV205 is not suitable for deep-sky targets. But for lunar and planetary imaging at a rock-bottom price, it delivers consistent results.
Who Should Buy This Camera
First-time astrophotographers who want to try lunar and planetary imaging without a big investment will find the SV205 to be a reliable starting point. The large community of users means you can find help and tutorials easily. It is also a good backup camera for experienced imagers who want something simple for outreach events.
Who Should Look Elsewhere
Anyone who wants to image nebulae, galaxies, or other deep-sky targets needs a cooled camera. The SV205’s lack of cooling and small sensor make it impractical for long-exposure work. If you want a camera that can also handle daytime photography, a mirrorless or DSLR camera is a better choice.
15. Canon EOS Rebel T7 DSLR Camera – Best DSLR for Astrophotography Beginners

- Massive community support and tutorials
- APS-C sensor with good resolution
- Included kit lens for starters
- Versatile for day and night photography
- No articulating screen
- Limited high ISO performance compared to mirrorless
- Older DSLR technology
The Canon EOS Rebel T7 is the camera I recommend to every beginner who asks where to start with astrophotography. With over 8,400 reviews, this is the most popular entry-level DSLR for a reason. The price, the community support, and the EF lens ecosystem make it nearly unbeatable for newcomers.
I took the Rebel T7 to a dark sky site with the included 18-55mm kit lens and shot 15-second exposures of the Milky Way at ISO 3200. The results were surprisingly good for a camera at this price point. With proper noise reduction and stacking, you can produce print-worthy Milky Way images.
For telescope work, the T7 connects to any telescope with a Canon T-ring adapter. I attached it to a 72mm doublet refractor on a star tracker and captured clean images of the Pleiades and the Orion Nebula after stacking about 40 frames each.
The Canon community is the biggest advantage here. Nearly every astrophotography tutorial, processing guide, and troubleshooting forum post references Canon cameras. If you get stuck, you will find help quickly. You can also pair it with solar filters for telescopes for safe solar imaging.
Who Should Buy This Camera
Beginners who want the most supported, most documented entry point into astrophotography should buy the Rebel T7. The included kit lens lets you start shooting wide-field nightscapes immediately. The APS-C sensor and EF mount give you room to grow with better lenses and telescope adapters. No other camera at this price offers this much community support.
Who Should Look Elsewhere
If you want the absolute best high ISO performance, a mirrorless camera will serve you better. The T7’s fixed screen makes framing awkward when the camera is pointed upward on a tripod. Experienced astrophotographers who need cooling for deep-sky work should look at dedicated astronomy cameras instead.
Buying Guide: How to Choose the Best Camera for Astrophotography
Choosing the right astrophotography camera depends entirely on what you want to photograph and how much experience you have. The best camera for Milky Way landscapes is completely different from the best camera for deep-sky nebulae. Let me break down the key factors that should drive your decision.
Sensor Size: Full-Frame vs APS-C vs Micro Four Thirds
Sensor size determines your field of view and how much light the camera gathers per exposure. Full-frame sensors offer the widest field of view and the best high ISO performance, making them ideal for Milky Way photography and wide-field nightscapes. The trade-off is cost and weight.
APS-C sensors are the sweet spot for most beginners. They offer a good balance of field of view, resolution, and price. Canon Rebel T7 and Sony a6400 both use APS-C sensors and are excellent starting points for astrophotography. The crop factor actually helps for some deep-sky targets by giving you a tighter framing.
Smaller sensors like Micro Four Thirds and 4/3-inch chips are common in dedicated astronomy cameras. They work well for deep-sky imaging because they pair naturally with telescope focal lengths. The smaller sensor means you need shorter focal length telescopes for wide targets, but the pixel sizes are often well-matched to typical seeing conditions.
Cooled vs Uncooled Sensors
Thermoelectric cooling is the single biggest advantage of dedicated astronomy cameras over DSLRs and mirrorless cameras. When a sensor runs for long periods during extended exposures, heat builds up and creates thermal noise in your images. A cooled sensor can be held at temperatures 25 to 35 degrees below ambient, dramatically reducing this noise.
If you plan to image faint deep-sky targets like galaxies and nebulae, a cooled camera like the ZWO ASI2600MC-Pro or SVBONY SV605CC will produce significantly cleaner data than any uncooled camera. The difference is not subtle. Cooled cameras can capture detail that is simply invisible in uncooled images.
For planetary and lunar imaging, cooling does not matter because exposures are fractions of a second. Thermal noise has no time to accumulate. This is why planetary cameras like the Celestron NexImage 20 and SVBONY SV705C do not include cooling systems.
DSLR vs Mirrorless vs Dedicated Astronomy Cameras
DSLRs like the Canon Rebel T7 remain popular for astrophotography because they are versatile, affordable, and have enormous community support. You can use a DSLR for daytime photography, Milky Way shots, and deep-sky imaging through a telescope. They are the best all-around choice for beginners.
Mirrorless cameras like the Canon EOS R8 and Sony a6400 are replacing DSLRs in the astrophotography world. They offer better high ISO performance, lighter weight, and features like focus peaking that make night photography easier. The main disadvantage is that many modern mirrorless cameras are more expensive than equivalent DSLRs.
Dedicated astronomy cameras like the ZWO ASI2600MC-Pro are purpose-built for astrophotography and nothing else. They offer thermoelectric cooling, high-quality sensors optimized for low-light performance, and seamless integration with telescope control software. The trade-off is that they cannot be used for any daytime photography.
The 500 Rule for Astrophotography
The 500 rule is a simple formula for determining the maximum shutter speed you can use without stars trailing when shooting on a fixed tripod. The formula is 500 divided by your lens focal length (accounting for crop factor). For example, with a 24mm lens on a full-frame camera, 500 divided by 24 equals about 21 seconds.
This rule matters for camera selection because it affects what focal length lenses you need. A camera with good high ISO performance lets you use faster shutter speeds and still capture enough light, which is why full-frame sensors are preferred for Milky Way photography on a fixed tripod.
If you use a star tracker or equatorial mount, the 500 rule no longer applies. You can expose for several minutes without trailing, which means even a modest camera can capture stunning detail. This is where pairing your camera with a good tracking mount becomes essential.
Pixel Size and Image Scale
Pixel size determines your image scale, which is how much sky each pixel covers. Larger pixels gather more light per pixel, which is better for sensitivity. Smaller pixels give you more resolution, which is better for detail. The ideal pixel size depends on your telescope’s focal length and your local seeing conditions.
For deep-sky imaging with typical refractor telescopes (400-800mm focal length), pixels between 3 and 5 microns work well. The IMX294 sensor in the SVBONY SV405CC has 4.63-micron pixels, which is an excellent match for most amateur telescopes. The IMX571 in the ZWO ASI2600MC-Pro has 3.76-micron pixels, which gives higher resolution but requires better tracking and seeing.
Budget Considerations
Your camera budget should be considered alongside your total astrophotography system cost. A camera is only one part of the equation. You also need a telescope or lens, a mount or star tracker, and potentially filters and accessories. Spending your entire budget on a camera and having nothing left for a good mount is a common beginner mistake.
For under 100 dollars, the SVBONY SV105 gets you imaging immediately. For under 500 dollars, the Canon Rebel T7 offers a complete system with room to grow. For under 1,000 dollars, the Sony a6400 delivers excellent mirrorless performance. For dedicated deep-sky work, the ZWO ASI2600MC-Pro at around 1,500 dollars is the gold standard for one-shot color imaging.
FAQs
What is the best camera to use for astrophotography?
The best camera for astrophotography depends on your target. For Milky Way and nightscape photography, the Canon EOS R8 full-frame mirrorless delivers outstanding high ISO performance. For deep-sky imaging of nebulae and galaxies, the ZWO ASI2600MC-Pro cooled astronomy camera is the top choice. Beginners should start with the Canon EOS Rebel T7, which offers the best combination of price, community support, and versatility.
What is the 500 rule in astrophotography?
The 500 rule is a formula for calculating the longest shutter speed you can use on a fixed tripod before stars begin to trail. Divide 500 by your effective focal length (lens focal length multiplied by crop factor). For example, a 24mm lens on a full-frame camera gives 500 divided by 24, which equals about 21 seconds. This rule helps maximize light gathering while keeping stars sharp when shooting without a tracking mount.
What camera should a beginner use for astrophotography?
Beginners should start with a Canon EOS Rebel T7 DSLR or a SVBONY SV105 telescope camera. The Rebel T7 offers a complete system with kit lens, enormous community support, and the ability to grow into telescope-based imaging. The SV105 is the cheapest entry point for attaching to an existing telescope. Both let you learn the fundamentals of astrophotography without a large upfront investment.
Is Nikon or Canon better for astrophotography?
Both Canon and Nikon produce excellent astrophotography cameras. Canon has historically dominated the astrophotography community with more tutorials, modification guides, and software compatibility. Canon’s EOS R8 and R6 Mark II are top mirrorless choices for night photography. Nikon’s D850 remains a favorite full-frame DSLR for astrophotography. The difference matters less than choosing a camera with good high ISO performance, a wide lens selection, and strong community support.
Final Thoughts on the Best Cameras for Astrophotography
The best cameras for astrophotography in 2026 span a wide range of prices and capabilities. For beginners, the Canon EOS Rebel T7 offers unbeatable value and community support. For Milky Way photographers, the Canon EOS R8 delivers full-frame performance in a compact body. And for serious deep-sky imagers, the ZWO ASI2600MC-Pro represents the pinnacle of one-shot color cooled imaging.
Your choice ultimately depends on what you want to photograph and how much you want to invest. Start with what fits your budget today, learn the fundamentals, and upgrade as your skills grow. The night sky will be there waiting, no matter which camera you choose.