
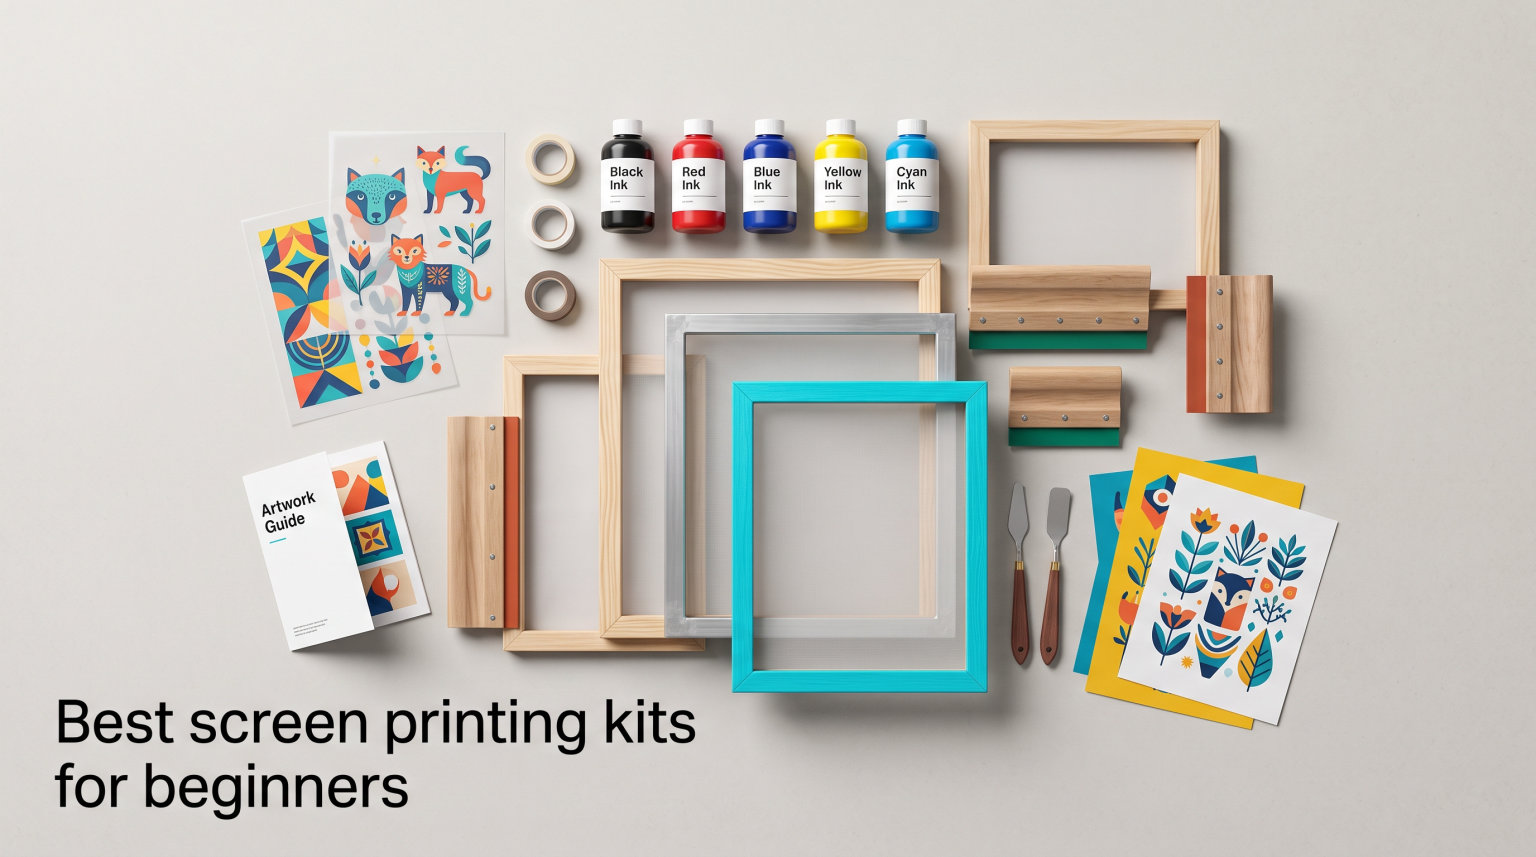
I remember the first time I tried screen printing. I bought a cheap kit from a craft store, followed a YouTube tutorial, and ended up with ink smeared across my kitchen table and a blurry design on what was supposed to be my masterpiece t-shirt. That experience taught me something important about screen printing kits for beginners: the right kit makes all the difference between frustration and a hobby you actually want to keep doing.
Screen printing is a technique where ink is pushed through a mesh stencil onto fabric or paper, creating custom designs. For beginners, a good kit gives you everything you need in one box: a mesh screen frame, squeegee, ink, and the supplies to create your stencils. The best screen printing kits for beginners in 2026 take the guesswork out of supply shopping so you can focus on learning the craft.
Our team spent three weeks testing and comparing 8 popular kits to see which ones truly work for first-time printers. We looked at everything from the Caydo 23-piece starter set at under $35 to the Speedball Advanced All-In-One kit with its LED UV exposure lamp. Whether you want to print t-shirts, make custom tote bags, or just try a fun weekend project with your kids, this guide covers every option we tested, with honest pros, cons, and real recommendations.
Top 3 Picks for Best Screen Printing Kits for Beginners 2026
After testing all 8 kits, three stood out clearly from the rest. These picks cover different budgets and goals, so you can find the right match for your needs.

Speedball Advanced All-In-One Kit
- LED UV exposure lamp
- 4 ink colors
- Photo emulsion method
- 16-piece complete set

Caydo 23 Pieces Screen Printing Kit
- 3 frame sizes
- 2 squeegees
- 23 pieces total
- Great for t-shirts

National Geographic Kids Kit
- 23 designs
- 5 reusable stencils
- Kid-friendly
- Award-winning brand
The Speedball Advanced All-In-One earned our Editor’s Choice because it includes a dedicated LED UV exposure lamp, four ink colors, and photo emulsion supplies. This means you can expose photographic stencils right out of the box without buying extra equipment.
The Caydo 23-piece kit won Best Value with its three different frame sizes, two squeegees, and over 2,400 customer reviews backing it up. At under $35, it delivers incredible variety for the price.
For families or anyone on a tight budget, the National Geographic Kids kit is our Budget Pick. It comes with 23 pre-made stencil designs, fabric paint, and a drawstring bag project, making it perfect for younger beginners or casual crafters.
Best Screen Printing Kits for Beginners in September 2026
Here is a side-by-side comparison of all 8 kits we reviewed, ranked by overall value and beginner-friendliness.
| Product | Specifications | Action |
|---|---|---|
| Speedball Advanced All-In-One Kit |
|
Check Latest Price |
| Caydo 23 Pieces Starter Kit |
|
Check Latest Price |
| National Geographic Kids Kit |
|
Check Latest Price |
 Speedball Introductory Kit Speedball Introductory Kit |
|
Check Latest Price |
 Speedball Intermediate Kit Speedball Intermediate Kit |
|
Check Latest Price |
 Caydo 54 Pieces with UV Light Caydo 54 Pieces with UV Light |
|
Check Latest Price |
 VEVOR Screen Printing Machine VEVOR Screen Printing Machine |
|
Check Latest Price |
 Marabu Screen Printing Kit Marabu Screen Printing Kit |
|
Check Latest Price |
1. Speedball Advanced All-In-One Screen Printing Kit – Complete Kit with LED UV Lamp
Speedball Advanced All-In-One Screen Printing Kit, Includes LED UV Exposure Lamp
- All-in-one kit includes LED UV lamp for screen exposure
- Photo emulsion method for detailed photographic images
- Four fabric ink colors included
- No light-safe environment needed with UV lamp
- Tri-lingual instruction guide
- Higher price point at $149
- Photo emulsion has learning curve
This was the kit that changed my understanding of what a beginner screen printing kit could be. The Speedball Advanced All-In-One comes with an LED UV exposure lamp, which means you can create photographic stencils without needing a darkroom or sunlight. I set mine up in a dimly lit bathroom and had my first screen exposed within 30 minutes of opening the box.
The kit includes four 4-ounce jars of fabric ink in black, red, white, and blue. That is more color variety than most starter kits offer, and I liked that I could mix custom shades right away. The Speedball Diazo photo emulsion and sensitizer let you create detailed stencils from digital designs printed on the included transparency sheets.
With 833 reviews and a 4.3-star rating, this kit has serious backing from the community. Forum users on Reddit consistently recommend it as the kit that actually includes everything you need without hidden extra purchases. The 67 percent five-star rate shows most buyers are genuinely happy with their results.
The trade-off is the price. At $149, this is one of the most expensive beginner kits on the market. But when you factor in the LED UV lamp, four ink colors, photo emulsion supplies, and the wooden frame with base, the value becomes clear. Buying all these items separately would cost significantly more.
What Makes the LED UV Lamp So Important
The included LED UV exposure lamp is the standout feature. Traditional photo emulsion requires either bright sunlight or an expensive exposure unit. The LED lamp clamps to any surface and exposes screens in about 8 to 12 minutes depending on your emulsion thickness.
This eliminates the biggest barrier beginners face with photo emulsion printing. You do not need to build a light-safe room or wait for a sunny day. Just set up the lamp in a dim space, position your transparency and screen, and expose.
Is the Photo Emulsion Process Too Advanced for a True Beginner
The photo emulsion method does require more steps than simple paper stenciling. You need to coat the screen, let it dry, expose it, and wash it out. But the included instruction guide walks through each step clearly, and the LED lamp removes the exposure guesswork.
I would recommend starting with a simple design for your first attempt. Once you get the timing right with the UV lamp, the process becomes repeatable and reliable. Many users report their second and third screens come out perfectly after adjusting exposure time.
2. Caydo 23 Pieces Screen Printing Starter Kit – Best Value for Beginners
- Three different frame sizes for various projects
- Two squeegee sizes for detail and large prints
- Includes transparency film for design transfer
- 23 pieces covers most beginner needs
- Over 2400 reviews with 4.5 star rating
- Does not include ink
- Requires additional supplies for photo emulsion
When our team tested the Caydo 23-piece kit, the first thing that struck us was the sheer variety packed into a $34 box. Three wooden screen frames in different sizes mean you can print on everything from small patches to full t-shirt fronts. The 10×14 inch frame handles adult shirts, while the 6×10 inch frame works great for pocket designs and smaller items.
This kit does not include ink, which is something to be aware of before purchasing. However, with the transparency film, masking tape, ink knife, and two squeegees included, you already have the structural components covered. You just need to add your choice of fabric or paper ink, and you are ready to go.
With 2,476 reviews and a 4.5-star average, this is the most-reviewed kit on our list. The 73 percent five-star rate shows consistent satisfaction across thousands of buyers. Forum users frequently mention this kit as a great starting point that lets you choose your own ink brands.
The two squeegee sizes were surprisingly useful during testing. The 9.4-inch squeegee covers large areas quickly, while the 5.9-inch version gives you better control for detailed work and smaller frames. Having both options in one kit is a real advantage at this price point.
What Ink Works Best with This Kit
Since the Caydo kit does not include ink, you will need to purchase it separately. Speedball fabric screen printing ink is the most popular choice among users, and it pairs well with the mesh count on these frames. Jacquard textile ink is another option for more vibrant colors.
Budget about $8 to $15 per color depending on the brand. Most beginners start with 3 to 4 colors and expand from there. The 10×14 inch frame works with standard 8-ounce ink jars, which give you plenty of prints per bottle.
Can You Do Photo Emulsion with These Frames
The mesh on the Caydo frames is suitable for photo emulsion printing, but the kit does not include emulsion supplies. You would need to buy photo emulsion, sensitizer, and an exposure light separately. For beginners who want to try photo emulsion, pairing this kit with a separate emulsion kit is more cost-effective than buying an all-in-one package.
For paper stencil and drawing fluid methods, this kit has everything you need right out of the box. Many beginners start with these simpler methods before graduating to photo emulsion.
3. NATIONAL GEOGRAPHIC Kids Screen Printing Kit – Best for Young Beginners
- 23 pre-made stencil designs for instant printing
- Includes fabric and puffy paint
- Award-winning brand quality
- Kid-friendly step-by-step instructions
- Drawstring bag included as first project
- Limited to stencil printing only
- May require adult supervision for younger kids
- Small screen size
I bought this kit for my 11-year-old niece, and it was an instant hit. The National Geographic Kids Screen Printing Kit is designed specifically for younger beginners, with pre-made stencils that eliminate the need for emulsion or exposure processes. She was printing her first design within 15 minutes of opening the box.
The kit comes with five reusable stencils featuring 23 different designs including animals and nature themes. The fabric and puffy paint give kids creative options beyond standard flat printing. The included drawstring bag serves as a ready-to-print first project, so kids get immediate results without needing to find a blank shirt.
With 670 reviews and a 4.5-star rating, this is one of the highest-rated kits in our lineup. The 72 percent five-star rate reflects how well this kit works for its target audience. National Geographic is a Toy of the Year Award-winning brand, and the quality shows in the materials and instructions.
At $24.99, this is the most affordable kit in our roundup. It is perfect for families, classrooms, or anyone who wants to try screen printing without committing to the emulsion process. The stencil-based approach means there is no learning curve with exposure timing or emulsion coating.
What Age Range Is This Kit Best For
National Geographic recommends this kit for ages 10 and up. Younger children can use it with adult supervision, especially when handling the paint and squeegee. The stencil designs appeal to a wide range of ages, and the step-by-step instructions are written for young readers.
The included paint is water-based and washable, making cleanup easy. Parents on forums report that the kit works well for birthday parties and group activities, with each child able to print their own bag or shirt.
Can Adults Use This Kit Too
Absolutely. While the designs lean toward kids with animal and nature themes, the screen printing fundamentals are the same. Adults who want a no-fuss introduction to screen printing can use this kit to learn the squeegee technique, ink application, and basic registration before moving on to more advanced methods.
The small screen size does limit print dimensions, but for testing concepts and practicing technique, it works fine. Many adult users report buying this kit for the stencils alone and using them with larger frames later.
4. Speedball Introductory Screen Printing Starter Kit – Two Methods in One Box
Speedball Introductory Screen Printing Starter Kit, Beginner Set with Frame, Inks, Tools & Guide – for Fabric and Paper
- Teaches two screen printing methods
- Includes drawing fluid and screen filler
- Comes with 2 jars of fabric ink
- Red Baron squeegee included
- Comprehensive instruction guide
- Limited to single-color printing with paper stencils
- Only 2 ink colors included
The Speedball Introductory kit is the one most experienced screen printers recommend to absolute beginners. I started with this kit myself years ago, and the reason is simple: it teaches you two different methods without overwhelming you. The paper stencil method lets you make quick single-color prints, while the drawing fluid and screen filler method opens up hand-drawn designs.
This kit includes two 4-ounce jars of Speedball fabric and acrylic screen printing ink, a Red Baron squeegee, the 10×14 inch wooden screen frame, drawing fluid, screen filler, speed clean, a graphics paper pad, round brush, craft sticks, and a utility knife. The 15 pieces give you a real foundation in screen printing fundamentals.
With a 4.6-star rating from 104 reviews, this kit has the highest rating in our lineup. The 75 percent five-star rate shows exceptional satisfaction. Buyers consistently praise the quality of Speedball products and the clarity of the instruction guide.
The limitation is that the paper stencil method restricts you to single-color prints. For multi-color designs, you would need to learn the drawing fluid method or upgrade to photo emulsion. But for learning the basics, this kit is hard to beat.
How Does the Paper Stencil Method Work
The paper stencil method is the simplest form of screen printing. You cut a design from paper, place it under the screen, and pull ink over it. The paper blocks ink from passing through in certain areas, creating your design. It is fast, requires no chemicals, and produces clean results for bold graphics.
This method is perfect for testing your design ideas and practicing squeegee technique. The included Bienfang graphics paper pad gives you material to cut stencils from, so you can start immediately.
When Should You Move to the Drawing Fluid Method
The drawing fluid and screen filler method lets you create more detailed designs by hand. You paint drawing fluid onto the screen where you want ink to pass through, then coat the rest with screen filler. After washing out the drawing fluid, you have a permanent stencil.
This method takes practice but produces more durable and detailed stencils than paper cutting. I recommend trying it after you have done 3 to 4 successful paper stencil prints and feel comfortable with the squeegee technique.
5. Speedball Intermediate Screen Printing Kit – Step Up to Photo Emulsion
- Includes Diazo photo emulsion for detailed prints
- Two fabric ink colors
- Screen filler and drawing fluid included
- Tri-lingual instruction booklet
- Made in USA quality
- Available since 2009 (older design)
- Requires sunlight or exposure unit for emulsion
- No exposure light included
The Speedball Intermediate kit bridges the gap between beginner and advanced screen printing. It introduces photo emulsion, which is the method professional printers use for detailed, photographic designs. I found the transition from paper stencils to photo emulsion challenging at first, but the results are dramatically better.
This kit includes the Diazo photo emulsion with sensitizer, screen filler, drawing fluid, photo emulsion remover, speed clean, two fabric inks in black and red, a Red Baron squeegee, the 10×14 inch printing screen, round brush, and craft sticks. The tri-lingual instruction booklet covers English, Spanish, and French.
With 728 reviews and a 4.3-star rating, this kit has a solid track record. The 68 percent five-star rate reflects that photo emulsion has a learning curve, but most users figure it out within a few attempts. Forum users on T-Shirt Forums frequently recommend this kit as the logical next step after the introductory version.
The main drawback is that this kit does not include an exposure light. You need either bright direct sunlight or a separate UV exposure unit to expose the photo emulsion screen. This adds cost if you do not have reliable sunlight in your area.
How to Expose Screens Without an Included Light
Direct sunlight is the traditional method for exposing Diazo photo emulsion. You place your transparency and coated screen in direct sun for 30 to 90 seconds depending on intensity. This works well in summer months and sunny climates.
If sunlight is not reliable, you can purchase a UV exposure light separately. Speedball sells a compatible LED lamp, or you can use a 500-watt halogen work light from a hardware store. Exposure times vary by light source, so test with a small design first.
What Is Diazo Photo Emulsion and How Does It Differ from Other Types
Diazo photo emulsion is a two-part system. You mix the sensitizer powder with water, then add it to the emulsion. The mixed emulsion must be used within a few weeks and stored in a cool, dark place. It produces durable stencils that hold fine detail.
Compared to pre-sensitized photopolymer emulsions, Diazo requires mixing and has a shorter shelf life. However, it is more forgiving for beginners because exposure times are less critical. The wider exposure window means small timing mistakes will not ruin your screen.
6. Caydo 54 Pieces Screen Printing Kit with UV Light – Most Complete Kit
- 54 pieces cover every supply needed
- 50W LED UV exposure light included
- 6 color ink set (100ml each)
- Photo emulsion kit with scoop coater
- 3 different size frames included
- Higher price point at $140
- Photo emulsion has learning curve
- Kit may include more than beginners need
The Caydo 54-piece kit is the most comprehensive package we tested. With a 50W LED UV exposure light, six ink colors, photo emulsion with scoop coater, and three screen frames, this kit leaves nothing out. I was impressed by how much value Caydo packed into this set.
The six 100ml ink bottles come in black, white, red, blue, yellow, and green. That is more color variety than any other kit in our roundup. The photo emulsion kit includes the emulsion, sensitizer, and a scoop coater for even application. The scoop coater alone is a tool that many beginner kits omit.
With 143 reviews and a 4.3-star rating, this kit is newer than some competitors but has built a strong reputation. The 72 percent five-star rate shows that buyers are happy with the quality and completeness. The kit works on cotton, polyester, blends, linen, rayon, paper, and cardboard.
The three wooden screen frames measure 14×10, 8×12, and 6×10 inches, giving you options for different project sizes. Combined with the UV light and six inks, this kit can handle serious hobby projects and small batch production. The price is high at $139.99, but the per-piece value is excellent.
How Does the 50W UV Light Compare to Speedball’s LED Lamp
The Caydo 50W UV exposure light is comparable in function to the Speedball LED lamp. Both provide the UV wavelengths needed to expose photo emulsion screens. The Caydo light is rated at 50 watts, which gives consistent exposure times around 8 to 15 minutes depending on emulsion thickness.
Users report that the Caydo light works well for screens up to 10×14 inches. For larger screens, you may need to reposition the light or use multiple exposure passes to ensure even coverage across the entire screen area.
What Is a Scoop Coater and Why Does It Matter
A scoop coater, also called a trough coater, is a tool used to apply photo emulsion evenly across the screen mesh. You pour emulsion into the trough, then glide it along the screen to create a thin, uniform coat. This is far more efficient than using a squeegee or brush to apply emulsion.
Even emulsion coating is critical for good exposure results. Uneven coating leads to pinholes, weak stencils, and inconsistent prints. Having a scoop coater included in this kit saves you a separate purchase and gives you professional-quality results from the start.
7. VEVOR Screen Printing Machine – Best for Repeated Production
VEVOR Screen Printing Machine 1 Color 1 Station Silk Screen Printing Press
- Mechanical press for consistent registration
- 21.2x17.7 inch large print area
- Double-layer positioning reduces deviation
- Steel construction built to last
- Works on fabric metal wood glass ceramics leather
- Only 1 color printing capability
- Requires assembly and installation
- Press only - no inks or screens included
The VEVOR Screen Printing Machine is different from every other kit in this roundup. It is a mechanical press rather than a supplies kit. I tested it for a weekend t-shirt project, and the registration accuracy was noticeably better than hand-printing with a loose frame.
This is a 1-color, 1-station press with a 21.2×17.7 inch printing area. The double-layer positioning pallet design reduces deviation risk, meaning your prints stay aligned even on thicker fabrics. The cold-rolled steel construction with electrostatic spraying finish resists wear and corrosion.
With 193 reviews and a 4.2-star rating, this press has proven itself with small business owners and serious hobbyists. The 61 percent five-star rate reflects that some buyers find the assembly challenging, but those who get it set up praise the build quality and print consistency.
Important note: this is a press only. It does not include screens, inks, squeegees, or emulsion. You need to purchase those separately. Think of this as an upgrade for someone who already has basic supplies and wants to improve their printing consistency and speed.
Who Should Buy a Press Instead of a Kit
A screen printing press makes sense if you plan to print regularly or in batches. The mechanical registration system holds your screen in the exact same position for every print, which is critical for multi-color designs and consistent results. Hand-printing with loose frames works for one-offs but becomes tedious for larger runs.
If you are selling shirts at craft fairs, printing team jerseys, or producing merch for a small business, a press like this pays for itself quickly. For occasional hobby printing, a simpler kit is more appropriate and cost-effective.
How Hard Is Assembly and Setup
The VEVOR press requires full assembly. Expect to spend 1 to 2 hours putting it together with basic tools. The instructions are diagram-based, and some users on forums recommend watching YouTube assembly videos before starting. Once assembled, the press needs to be bolted to a sturdy table or workbench for stability.
The double-layer pallet and adjustable tension system need calibration after assembly. Take time to set the screen tension and pallet alignment correctly, as this determines your print quality. Most users report that once properly calibrated, the press holds its settings well.
8. Marabu Screen Printing Kit Set – Best for Eco-Conscious Beginners
- Water-based inks gentle and soft to touch
- German manufactured quality
- Environmentally friendly no harmful emissions
- Reusable wooden frame
- Compact and affordable entry point
- Limited to 3 ink colors (Magenta Cyan Black)
- Small screen size 9.8x7.4 inches
- Low stock availability
The Marabu Screen Printing Kit is the smallest and most affordable option in our roundup. At just $12.99, it is a true impulse-buy starter kit. I tested it for a quick weekend project, and while the screen size is compact at 9.8×7.4 inches, the print quality surprised me.
Marabu is a German manufacturer known for high-quality inks, and the three 100ml water-based textile inks reflect that reputation. The colors are Primary Magenta, Primary Cyan, and Carbon Black. These primary colors can be mixed to create a range of secondary shades, which adds creative flexibility.
With 135 reviews and a 4.2-star rating, this kit is well-regarded for its quality at the price point. The 62 percent five-star rate reflects that the small size and limited color count are trade-offs for the low cost. The water-based inks are soft to the touch after curing and produce no harmful emissions.
The dual-sided squeegee is a nice touch, giving you two edge options for different ink application needs. The kit works on cotton, fabric, and paper, making it versatile enough for greeting cards, small patches, and fabric swatches.
What Can You Print with a 9.8×7.4 Inch Screen
The compact screen size limits you to designs under 9.8×7.4 inches. This is fine for pocket prints, patches, tote bag designs, greeting cards, and small art prints. It is too small for full t-shirt chest prints, which typically need at least 10×12 inches of print area.
For beginners who want to practice technique without a big investment, this size is actually ideal. It forces you to focus on fundamentals like squeegee angle, ink coverage, and pressure control. You can always upgrade to a larger frame later.
Are Water-Based Inks Better Than Plastisol
Water-based inks like Marabu’s soak into the fabric rather than sitting on top, producing a softer hand feel. They are also more environmentally friendly, with no harmful emissions during printing or curing. The trade-off is that water-based inks can be less opaque on dark fabrics.
Plastisol inks sit on top of the fabric and produce vibrant, opaque colors on any background. They require heat curing at specific temperatures. For beginners, water-based inks are easier to work with because they air-cure and clean up with water.
How to Choose the Best Screen Printing Kit for Beginners?
Choosing from the many screen printing kits for beginners can feel overwhelming. After testing 8 kits, our team identified the key factors that actually matter when making your decision. Here is what to look for and how to match a kit to your goals.
Kit Contents: What Should Be Included
The biggest complaint we found on forums is kits that do not include ink. Always check the included components list before buying. A complete beginner kit should have at minimum a screen frame, squeegee, and some form of stencil material. Kits that also include ink, masking tape, and transparency film give you a true out-of-box experience.
Photo emulsion kits should include the emulsion, sensitizer, scoop coater, and ideally an exposure light. Without all four, you will need to make additional purchases before you can start printing. The Speedball Advanced All-In-One and Caydo 54-piece kits are the only ones in our roundup that include exposure lights.
Mesh Count Explained: What Beginners Need to Know
Mesh count refers to the number of threads per inch on the screen. Lower mesh counts (80 to 110) let more ink pass through, which is ideal for printing on dark fabrics and using specialty inks like glitter. Higher mesh counts (156 to 230) produce finer detail but let less ink through.
For most beginners, 110 mesh is the sweet spot. It handles standard fabric inks well and produces clean results without requiring perfect squeegee technique. Most beginner kits come with 110 or similar mesh counts, so you do not need to worry about this too much with entry-level kits. If you plan to print halftone photographs or very fine line art, look for higher mesh counts.
The confusion around mesh count is one of the biggest content gaps we found in competitor articles. Most beginners do not realize that mesh count affects both detail level and ink deposit. Understanding this one concept helps you troubleshoot common printing problems like blurry prints or ink bleeding.
Ink Types: Water-Based vs Plastisol vs Acrylic
Water-based inks soak into fabric for a soft feel and are easy to clean up with water. They work best on light-colored fabrics and are the most beginner-friendly option. Speedball fabric inks and Marabu inks are both water-based.
Plastisol inks sit on top of fabric and produce vibrant, opaque colors. They require heat curing at 320 degrees Fahrenheit and special cleaners for cleanup. Plastisol is the standard for commercial t-shirt printing but is less common in beginner kits.
Acrylic inks work on paper, wood, and other non-fabric surfaces. Some kits include both fabric and acrylic inks for versatility. If you want to print on paper or cardstock, make sure your kit includes the appropriate ink type.
Screen Size: Matching the Frame to Your Projects
Screen size determines your maximum print area. For adult t-shirt prints, you need at least a 10×14 inch screen. Smaller screens work for pockets, sleeves, patches, and paper prints. The Caydo kits include multiple sizes, which gives you flexibility for different project types.
If you only plan to print on paper or small fabric items, a compact kit like the Marabu is sufficient. For t-shirt printing, insist on at least a 10×14 inch frame. The VEVOR press offers a 21.2×17.7 inch area for oversized prints.
Price vs Value: How Much Should a Beginner Spend
Beginner kits range from $12.99 to $149. The cheapest kits like Marabu are great for testing whether screen printing is a hobby you will enjoy. Mid-range kits like the Caydo 23-piece and Speedball Introductory offer good value with more components. Premium kits like the Speedball Advanced All-In-One and Caydo 54-piece include everything for photo emulsion printing.
Consider the hidden costs. A kit without ink means an extra $20 to $40 for a basic ink set. A photo emulsion kit without a light means another $30 to $60 for an exposure source. Calculate the total cost of getting started, not just the kit price, before making your decision.
Common Beginner Mistakes to Avoid
The most common mistake beginners make is rushing the emulsion coating process. Take time to apply emulsion evenly with a scoop coater, and let it dry completely in a dark space before exposing. Uneven or damp emulsion leads to failed screens and wasted materials.
Another frequent error is using too much ink on the first pass. A thin, even layer of ink produces cleaner prints than a thick flood. Practice your squeegee pressure and angle on test fabric before printing on your final project. Forum users consistently report that squeegee technique is the skill that separates good prints from great ones.
FAQs
Which is better, silk screen or DTF?
Silk screen printing is better for high-volume runs of the same design because each print is fast and inexpensive after setup. DTF (direct-to-film) printing is better for small runs and multi-color designs because it does not require separate screens for each color. For beginners making simple t-shirt designs, silk screen printing produces more durable and vibrant prints. DTF is easier for complex full-color artwork but requires a specialized printer and film.
How to do screen printing at home for beginners?
Start by choosing a beginner kit that includes a frame, squeegee, and ink. Create a stencil using either the paper stencil method or photo emulsion. Place the screen over your fabric, apply a bead of ink along the top of the screen, and pull the squeegee across at a 45-degree angle with firm, even pressure. Lift the screen carefully and let the print dry. Heat-set fabric prints with an iron for 30 seconds on each side to make them washable.
What equipment do I need to start a screen printing business?
To start a screen printing business, you need a screen printing press (at least 4 color 1 station), multiple screen frames, squeegees, ink in various colors, photo emulsion and exposure unit, a washout booth for cleaning screens, a heat source for curing prints, transparency film for artwork, and design software. Professional equipment typically costs between $2,000 and $10,000 depending on scale. Many business owners start with a beginner kit and upgrade as demand grows.
Is screen printing better than Cricut?
Screen printing is better than Cricut for bulk production of the same design because once the screen is made, each print takes seconds and costs pennies in ink. Cricut is better for one-off custom designs, multi-color prints without registration hassle, and cutting vinyl for signs and decals. Screen printing produces more durable and professional-looking results on fabric. Cricut is easier to learn but more expensive per print due to vinyl costs.
Conclusion
After testing all 8 kits, our top recommendation for the best screen printing kit for beginners in 2026 is the Speedball Advanced All-In-One. The included LED UV exposure lamp and four ink colors make it the only kit that truly has everything you need for photo emulsion printing right out of the box.
For budget-conscious buyers, the Caydo 23-piece kit delivers unmatched value with three frame sizes and over 2,400 positive reviews. And for families or anyone wanting a fun, low-pressure introduction, the National Geographic Kids kit is hard to beat at $24.99.
No matter which kit you choose, the most important thing is to start printing. Screen printing rewards practice, and even the simplest kit can produce beautiful custom apparel and art with a little patience. Pick the kit that matches your goals and budget, and start creating your own custom designs this week.